
DIY - Milk Carton Illuminated Village
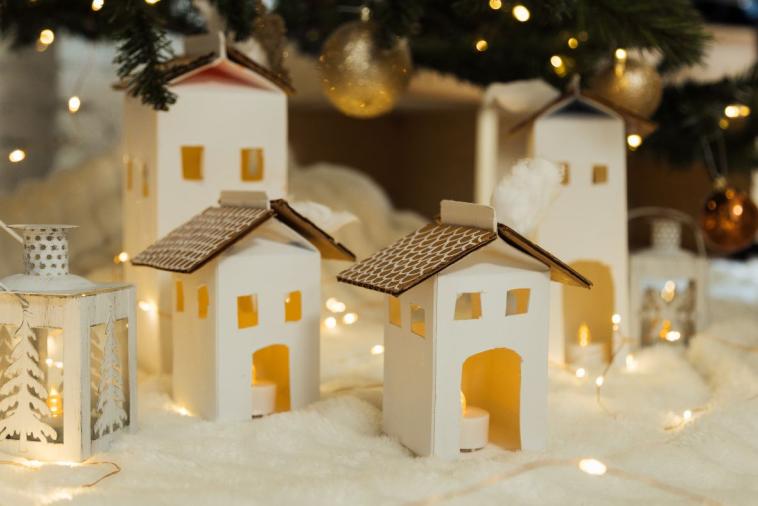
Transform your empty milk or cream cartons into a whimsical illuminated village that adds warmth and magic to any space. Unleash the artist in you and personalize each piece for a unique glow that reflects your style. Gather your family for a fun and creative activity before the Holidays!
- Prep: 30 min
Ingredients
- 4 Canadian milk or cream boxes of different sizes
- 1 brown cardboard box or thick construction paper to make the roofs
- 1 precision knife
- White paint
- Super glue or hot glue
- 1 ruler
- 1 pencil
- 1 pair of scissors
- 1 white marker (chalky)
- Cotton or fake snow

READY FOR REWARDS?
Sign up for our new More Goodness program for exclusive offers, recipes, contests and more.
Preparation
Thoroughly wash the cardboard boxes to remove any residue and dry them completely before starting.
Use a precision knife to create windows and a door on each box, appropriate to the size of the houses. The door should be large enough to hold a candle.
Apply a coat of white paint to the entire surface of the boxes to give them a uniform look, creating the base for the houses.
Take a brown cardboard box to design the roofs. Measure so that they stick out 0.5 inch (approx. 1.3 cm) from the top of the milk carton for a realistic roof overhang, then use a precision knife to cut out the two pieces for the roof sides. Make a hole for the neck of the bottle.
Glue the two roof faces to the house with strong glue. Once dry, use a white marker or white paint pen to draw tiles on the roof.
Take some cotton or fake snow, stretch it out and stick it inside the hole in the bottle to create a smoke effect coming out of the chimney.
Insert LED candles or battery-powered lights through the cut-out windows and doors to light up the inside of the houses.
Arrange the finished houses on a table or windowsill to create a festive atmosphere.
